前田稔(Maeda Minoru)の超初心者のプログラム入門
![]()
![]()
| ファイル名 | 説明 |
|---|---|
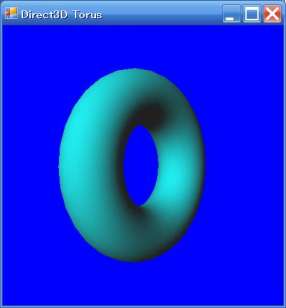
| DXTorus.cpp | Torus を描画 |
    #using <System.dll>
    #using <System.Windows.Forms.dll>
    #using <System.Drawing.dll>
    #using <Microsoft.DirectX.dll>
    #using <Microsoft.DirectX.Direct3D.dll>
    #using <Microsoft.DirectX.Direct3DX.dll>

    using namespace System;
    using namespace System::Windows::Forms;
    using namespace System::Drawing;
    using namespace Microsoft::DirectX;
    using namespace Microsoft::DirectX::Direct3D;
|
    ref class D3DModel : public System::Windows::Forms::Form
    {
        Microsoft::DirectX::Direct3D::Device  ^device;      // rendering device
        Microsoft::DirectX::Direct3D::Mesh    ^mesh;        // mesh object
        bool pause;

      public:
        // Constructor
        D3DModel()
        {
            device = nullptr;
            mesh = nullptr;
            pause = false;
            // Window のサイズを設定
            this->ClientSize = System::Drawing::Size(400,400);
            // caption の設定
            this->Text = "Direct3D Model";
        }
|
    bool InitializeGraphics()
    {
        PresentParameters ^presentParams = gcnew PresentParameters();
        presentParams->Windowed = true;
        presentParams->SwapEffect = SwapEffect::Discard;
        presentParams->EnableAutoDepthStencil = true;
        presentParams->AutoDepthStencilFormat = DepthFormat::D16;

        // Create the D3DDevice
        device = gcnew Device(0, DeviceType::Hardware, this, CreateFlags::SoftwareVertexProcessing, presentParams);
        if (device==nullptr)
        {   MessageBox::Show("Create Direct3D Device Error.");
            return false;
        }
        device->DeviceReset += gcnew System::EventHandler(this, &D3DModel::OnResetDevice);
        this->OnResetDevice(device, nullptr);
        pause = false;
        return true;
    }
|
    void OnResetDevice(Object^ sender, EventArgs^ e)
    {
        device->RenderState->ZBufferEnable = true;  // Turn on the zbuffer
        device->RenderState->Lighting = true;       // make sure lighting is enabled
        //☆ トーラスメッシュの生成
        mesh = Mesh::Torus(device, 16.0f, 40.0f, 32, 32);
    }
|
    void SetupMatrices()
    {
        device->Transform->World = Matrix::RotationY(Environment::TickCount / 1000.0f);
        device->Transform->View = Matrix::LookAtLH(Vector3(0.0f, 3.0f, -200.0f),
                Vector3(0.0f, 0.0f, 0.0f), Vector3(0.0f, 1.0f, 0.0f));
        device->Transform->Projection = Matrix::PerspectiveFovLH((float)(Math::PI/4), 1.0f, 1.0f, 500.0f);
    }
|
    void SetupLights()
    {
        System::Drawing::Color col = System::Drawing::Color::White;
        Direct3D::Material mtrl = Direct3D::Material();
        mtrl.Diffuse = col;
        mtrl.Ambient = col;
        device->Material = mtrl;

        device->Lights[0]->Type = LightType::Directional;
        device->Lights[0]->Diffuse = System::Drawing::Color::Yellow;
        //device->Lights[0]->Diffuse = System::Drawing::Color::DarkTurquoise;
        //device->Lights[0]->Diffuse = System::Drawing::Color::Red;
        //☆ ライトの座標を設定する
        device->Lights[0]->Direction = Vector3(50.0f, -40.0f, 100.0f);
        device->Lights[0]->Enabled = true;
        device->RenderState->Ambient = System::Drawing::Color::FromArgb(0x202020);
    }
|
    void Render()
    {
        if (device==nullptr)    return;
        if (pause)              return;

        device->Clear(ClearFlags::Target | ClearFlags::ZBuffer, System::Drawing::Color::Blue, 1.0f, 0);
        device->BeginScene();

        // Rendering of scene objects can happen here
        SetupLights();
        SetupMatrices();
        mesh->DrawSubset(0);

        device->EndScene();
        device->Present();
    }
|
![]()