![]()
| ファイル名 | 説明 |
|---|---|
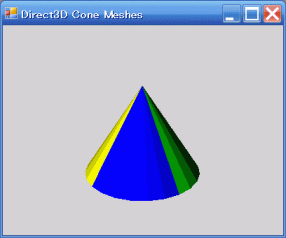
| DXCone.cpp | コーンのメッシュ(cone.x)を描画する |
ref class D3DModel : public System::Windows::Forms::Form
{
    Device      ^_device;       // rendering device
    Mesh        ^_mesh;         // mesh object
    array<ExtendedMaterial> ^_materials;    // mesh Materials
    array<Texture^>         ^_textures;     // mesh Textures
|
    void OnResetDevice(Object^ sender, EventArgs^ e)
    {
        _device->RenderState->ZBufferEnable = true;  // Turn on the zbuffer
        _device->RenderState->Lighting = true;       // make sure lighting is enabled
        // X-FILE をロード
        System::IO::Directory::SetCurrentDirectory("C:\\data\\xfile\\");
        _mesh = Mesh::FromFile("cone.x",MeshFlags::Managed,_device,_materials);

        // テクスチャーがあれば読み込み
        _textures = gcnew array<Texture^>(_materials->Length);
        for(int i=0; i<_materials->Length; i++)
        {   _textures[i] = nullptr;
            if (_materials[i].TextureFilename!=nullptr &&
                _materials[i].TextureFilename->Length >= 1)
            {   _textures[i]= TextureLoader::FromFile(_device,_materials[i].TextureFilename); }
        }
|
    void Render()
    {
        if (_device==nullptr)   return;
        if (pause)              return;

        _device->Clear(ClearFlags::Target|ClearFlags::ZBuffer,System::Drawing::Color::Blue,1.0f,0);
        _device->BeginScene();
        SetupLights();
        SetupMatrices();
        // メッシュの描画
        for(int i=0; i<_materials->Length; i++)
        {
            _device->SetTexture(0,_textures[i]);
            _device->Material = _materials[i].Material3D;
            _mesh->DrawSubset(i);
        }
        _device->EndScene();
        _device->Present();
    }
|
![]()